The Frog Dissection Lab Activity is a hands-on biology experiment that helps students study external features, internal organs, and the organization of body systems in a vertebrate animal. In this supervised science laboratory activity, students examine a frog closely, identify major anatomical structures, and connect what they observe to biological function. It is a practical way to make anatomy more visible, meaningful, and memorable in the classroom.
📘 Overview
Science is often best learned when students are able to discover, perform, and apply scientific methods directly in class. In this dissection laboratory activity, pre-lab preparation is important because it helps students understand the objectives, required materials, safety expectations, and learning outcomes before the activity begins. The safety laboratory form is also given in advance so that students and parents are aware of the responsibilities involved, especially because the activity uses sharp tools such as scalpels and dissecting scissors.
This frog dissection activity focuses on both external anatomy and internal organ systems. Students begin by examining visible features such as the eyes, tympanic membranes, mouth, and skin texture, then proceed to identify major internal organs, including the liver, lungs, heart, stomach, intestines, kidneys, and reproductive organs. Through this process, students gain a stronger understanding of anatomy, organ systems, and the value of careful scientific observation.
🎯 Learning Objective
- Students will identify the major external features of a frog.
- Students will locate and identify the major internal organs of a frog.
- Students will understand how different body systems are arranged and function together.
- Students will develop careful observation and dissection skills in a supervised lab setting.
- Students will follow proper laboratory safety, cleanup, and specimen-handling procedures.
🧪 Materials
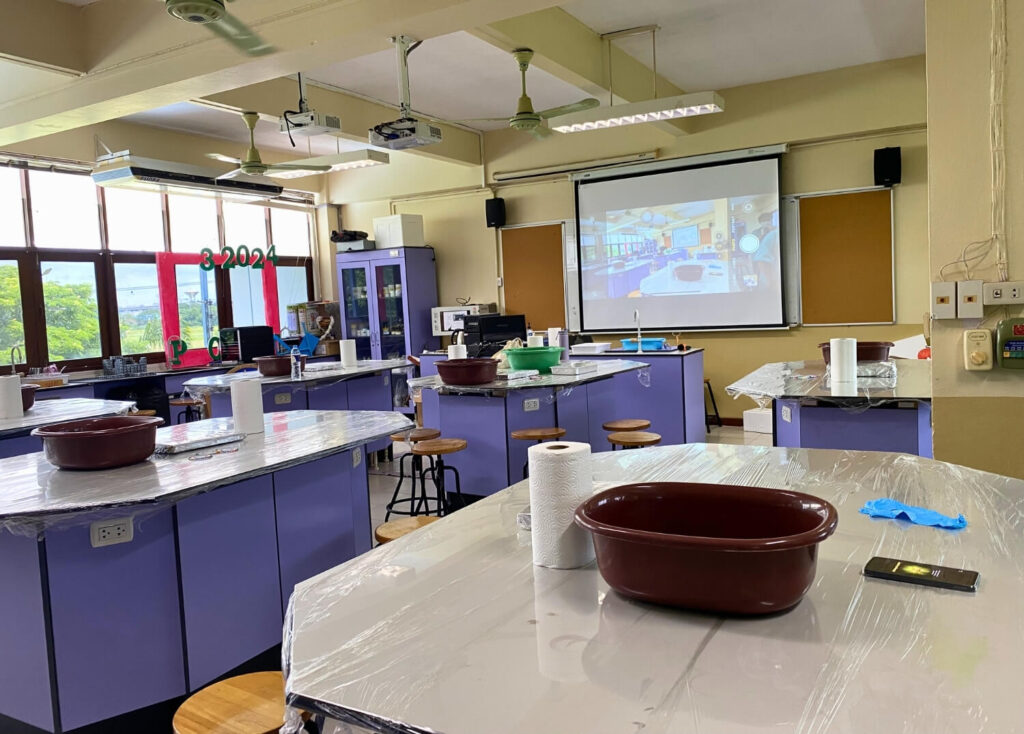
- Dissection tray
- Used to hold the frog securely during the activity.
- Used to hold the frog securely during the activity.
- Dissection pins
- Used to secure the frog’s limbs and pin back tissue flaps.
- Used to secure the frog’s limbs and pin back tissue flaps.
- Scissors
- Used for careful cutting during the dissection.
- Used for careful cutting during the dissection.
- Scalpel
- Used for precise incisions.
- Used for precise incisions.
- Forceps
- Used to separate and lift tissue carefully.
- Used to separate and lift tissue carefully.
- Dissection probe
- Used to inspect and point to anatomical structures.
- Used to inspect and point to anatomical structures.
- Gloves
- Used to protect the hands during the activity.
- Used to protect the hands during the activity.
- Safety goggles / eye protection
- Used during the laboratory activity for safety.
- Used during the laboratory activity for safety.
- Lab gown
- Worn during the dissection activity as part of the required safety procedure.
- Worn during the dissection activity as part of the required safety procedure.
- Mask
- Worn during the laboratory session.
- Worn during the laboratory session.
- Frog specimen
- The specimen used for external and internal anatomical study.
- The specimen used for external and internal anatomical study.
- Dissection guide or anatomy chart
- Used to support organ identification during the activity.
📝 Procedure
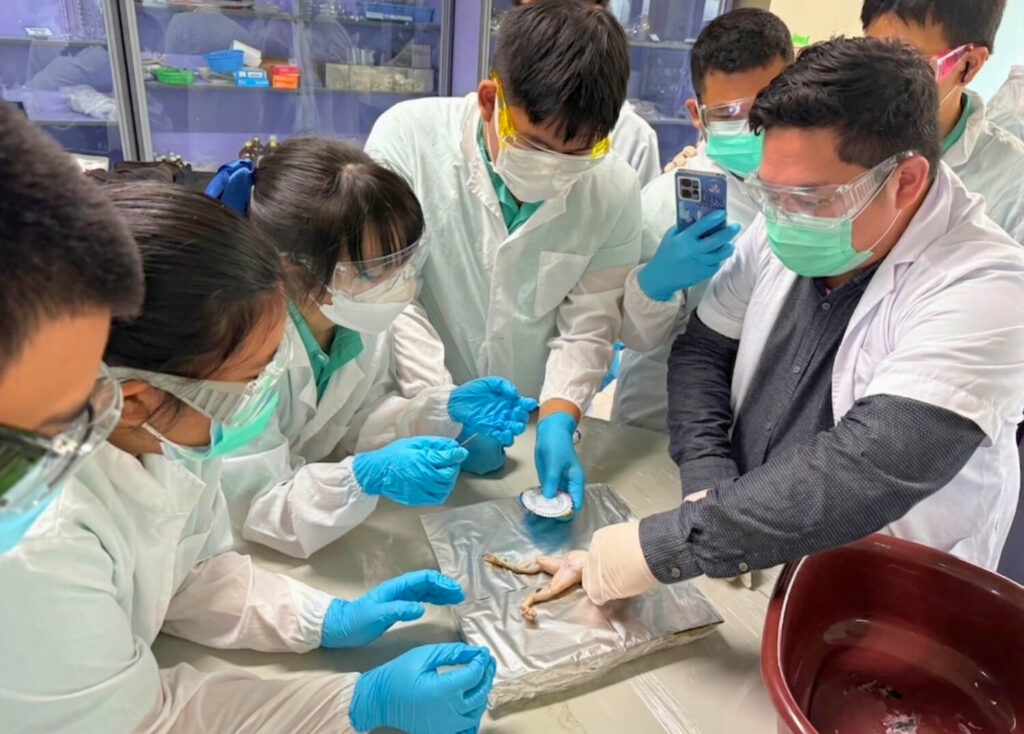
- Begin with a pre-lab discussion to ensure students understand the objectives, procedures, tools, and safety expectations.
- Review the safety laboratory form and remind students of their responsibilities before beginning the activity.
- Put on gloves, safety goggles, a lab gown, a mask, and any other required protective equipment.
- Make sure the workspace is clean, organized, and well-lit.
- Place the frog on its back in the dissection tray.
- Use dissection pins to secure the frog’s legs and arms spread out in the tray.
- Observe the frog’s external features, including the eyes, tympanic membranes, mouth, and skin texture.
- Make a small incision in the skin near the abdomen, below the sternum, and extend it carefully toward the lower abdomen and throat.
- Use forceps to separate the skin from the underlying muscle tissue, make lateral cuts near the limbs, and pin the skin flaps back to expose the muscle.
- Make a similar incision through the muscle layer beneath the skin, taking care not to damage internal organs. Pin the muscle flaps back.
- Locate and identify the major organs, including the liver, lungs, heart, stomach, intestines, kidneys, and reproductive organs. Use an anatomy chart or guide for support.
- Lift the heart carefully to observe the lungs beneath it and note the placement and structure. The heart may also be lifted slightly to examine nearby major vessels.
- Locate the stomach and intestines and examine the digestive system.
- Identify the reproductive organs and trace the urinary system by locating the kidneys and urinary bladder.
- Record final observations, note any unusual findings, and compare the results with an anatomical guide.
- Properly dispose of the specimen and other biological waste according to institutional guidelines, then clean and disinfect all tools and the laboratory workspace.
👀 Expected Observations
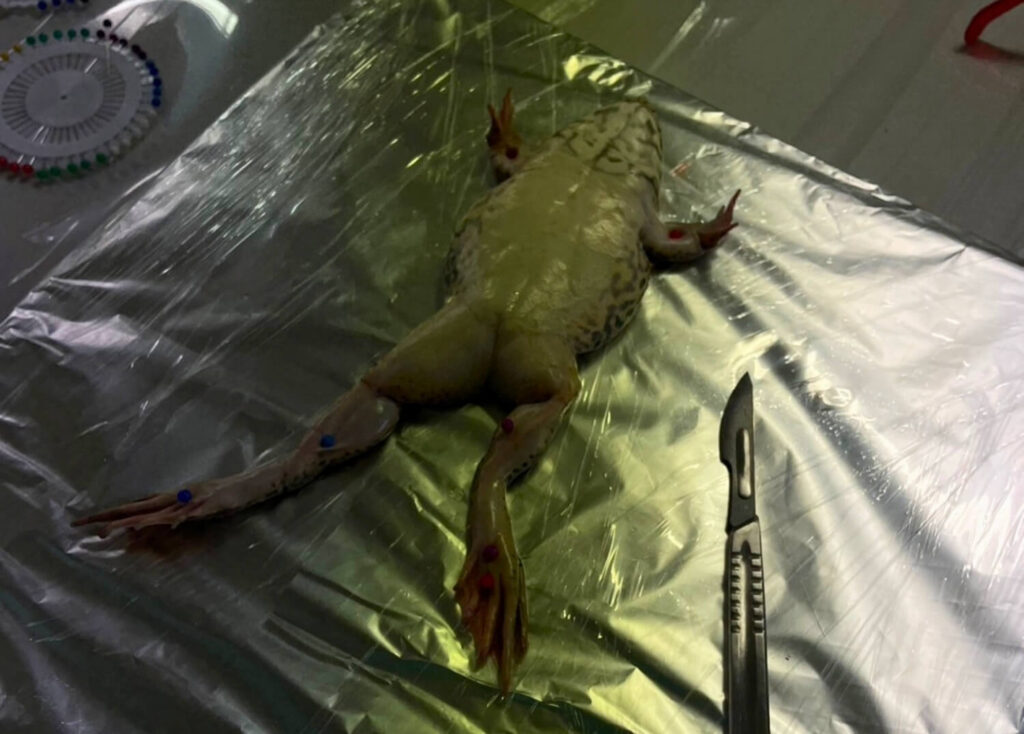
Students may observe:
- External features such as the eyes, tympanic membranes, mouth, and skin texture
- Layers of skin and muscle that can be separated during the dissection
- Major internal organs, including the liver, lungs, heart, stomach, intestines, kidneys, and reproductive organs
- The lungs located beneath the heart
- Visible differences in reproductive structures depending on whether the frog is male or female
- Variation in organ size, shape, or placement between specimens
- Unusual findings that can be compared with an anatomy guide
🧠 What’s Happening?
This activity helps students study how the frog’s body is organized from the outside in. The external anatomy gives students a chance to identify visible body structures and connect them to basic biological function. The internal anatomy then helps students see how major organ systems are arranged and how these systems work together inside a vertebrate animal.
By locating organs such as the heart, lungs, liver, stomach, intestines, kidneys, and reproductive structures, students gain a clearer understanding of structure and function in biology. This type of laboratory work also strengthens observation skills, careful tool handling, and evidence-based identification. Compared with diagrams alone, direct observation helps anatomy feel more concrete and easier to remember.
🌟 Learning Outcomes
Students can learn several important concepts and skills through this experiment:
- External Anatomy
- Students identify visible frog features and relate them to body structure.
- Students identify visible frog features and relate them to body structure.
- Internal Anatomy
- Students locate major organs and understand their placement within the body.
- Students locate major organs and understand their placement within the body.
- Organ Systems
- Students see how digestive, circulatory, respiratory, urinary, and reproductive structures are organized.
- Students see how digestive, circulatory, respiratory, urinary, and reproductive structures are organized.
- Structure and Function
- Students connect anatomical parts to the roles they perform.
- Students connect anatomical parts to the roles they perform.
- Scientific Observation
- Students practice careful observation, comparison, and anatomical identification.
- Students practice careful observation, comparison, and anatomical identification.
- Laboratory Dissection Skills
- Students build confidence in following procedures and handling dissection tools responsibly.
- Students build confidence in following procedures and handling dissection tools responsibly.
- Safety and Responsibility
- Students learn the importance of preparation, protective equipment, respectful specimen handling, cleanup, and proper disposal.
🎓 Classroom Notes
- This activity works best as a supervised biology laboratory dissection.
- Pre-lab preparation is important so students understand the objectives, tools, and safety expectations before starting.
- The strongest teaching value comes from combining observation, identification, and guided explanation.
- Students benefit from having an anatomy chart or guide available throughout the activity.
- Cleanup, tool care, and responsible specimen handling should be treated as important parts of the full learning process.
💬 Discussion Questions
- What external features of the frog were easiest to identify?
- What is the function of the tympanic membranes?
- Why is the frog placed on its back for the dissection?
- Why is it important to separate the skin from the muscle layer carefully?
- Which internal organs were easiest to identify?
- What did students notice about the placement of the heart and lungs?
- How does the digestive system of the frog compare with what students expected?
- What differences might appear between male and female reproductive organs?
- Why is an anatomy guide helpful during dissection?
- What did this activity help students understand that a diagram alone might not show?
🚀 Extension / Challenge
- Label a full frog anatomy diagram using observations from the lab.
- Compare frog anatomy with another vertebrate studied in class.
- Create a chart of external and internal structures observed during the dissection.
- Research how frog anatomy supports life both in water and on land.
- Write a short explanation of how the lungs and skin support respiration in amphibians.
- Compare the frog’s digestive system with that of another animal.
- Explain how organ position helps the frog’s body function efficiently.
- Reflect on what students learned from direct observation versus textbook diagrams.
- Summarize the most important body systems identified in the activity.
- Describe how this activity supports understanding of vertebrate anatomy.
🧾 Specimen Note
The specimen used in this laboratory activity was prepared for supervised classroom study. Students handled it respectfully and followed proper laboratory safety, hygiene, and disposal procedures throughout the activity.
⚠️ Safety Note
Before the laboratory activity, students should complete and return the safety contract with parent or guardian acknowledgment. During the activity, students must act responsibly, follow all teacher instructions, wear proper protective equipment, keep the workspace clean, and handle preserved specimens respectfully.
Students should never work alone, never eat or drink in the laboratory, know the location of safety and first aid equipment, report emergencies immediately, and use sharp tools such as scalpels and dissecting scissors only under direct teacher supervision.
📂 Media & Resources
For downloadable files and complete teaching resources, visit our Download Center.


![[BFITS] Be Like Millie_Volunteering Beyond the Classroom – Painting, Panthers, and Powerful Art!](https://bfitsthailand.com/wp-content/uploads/2025/01/BFITS-Be-Like-Millie_Volunteering-Beyond-the-Classroom-–-Painting-Panthers-and-Powerful-Art-300x109.webp)