The Edible Atomic Model Lab Activity is a creative chemistry experiment that helps students understand atomic structure using pancakes and edible decorations. In this supervised classroom activity, students build visual models of atoms by representing protons, neutrons, and electrons with food materials. It is a fun, hands-on way to make abstract atomic concepts easier to see, remember, and explain.
📘 Overview
Atomic models help students visualize the structure of atoms, including the arrangement of protons, neutrons, and electrons. Instead of using traditional materials like plastic, clay, or foam, this activity uses pancakes and edible decorations to create a sensory and memorable learning experience. Students connect chemistry with everyday life while applying creativity, measurement, teamwork, and scientific explanation.
This activity focuses on building an edible 3D atomic model using pancakes as the base structure and fruits, candies, syrup, or icing to represent atomic particles. Students can model simple atoms such as hydrogen, helium, or carbon while explaining the number and placement of protons, neutrons, and electrons.
🎯 Learning Objective
- Students will identify the basic parts of an atom: protons, neutrons, and electrons.
- Students will create a 3D atomic model using edible materials.
- Students will explain how the number of protons, neutrons, and electrons relates to atomic structure.
- Students will connect abstract chemistry concepts to a hands-on model.
- Students will practice creativity, teamwork, presentation, and scientific explanation.
🧪 Materials

For Pancakes
- All-purpose flour (1 cup)
- Serves as the base ingredient for the pancake batter.
- Serves as the base ingredient for the pancake batter.
- Baking powder (1 teaspoon)
- Helps the pancakes rise and become light.
- Helps the pancakes rise and become light.
- Sugar (1 tablespoon)
- Adds sweetness to the batter.
- Adds sweetness to the batter.
- Salt (¼ teaspoon)
- Balances the flavor.
- Balances the flavor.
- Milk (¾ cup)
- Adds moisture and helps combine the ingredients.
- Adds moisture and helps combine the ingredients.
- Egg (1 large)
- Helps bind the batter together.
- Helps bind the batter together.
- Melted butter (1 tablespoon)
- Adds richness and supports texture.
- Adds richness and supports texture.
- Food coloring: red, blue, green (optional)
- Can be used to color batter for different atomic particles.
For Decorations
- Strawberries
- Used to represent protons.
- Used to represent protons.
- Banana slices
- Used to represent neutrons.
- Used to represent neutrons.
- Blueberries or candies
- Used to represent electrons.
- Used to represent electrons.
- Toothpicks or skewers
- Used to show electron paths or help position parts of the model.
- Used to show electron paths or help position parts of the model.
- Chocolate syrup or icing (optional)
- Used for labeling parts of the atomic model.
Tools
- Mixing bowls
- Whisk or fork
- Non-stick frying pan or griddle
- Spatula
- Measuring cups and spoons
- Small bowls for separating and coloring batter
📝 Procedure
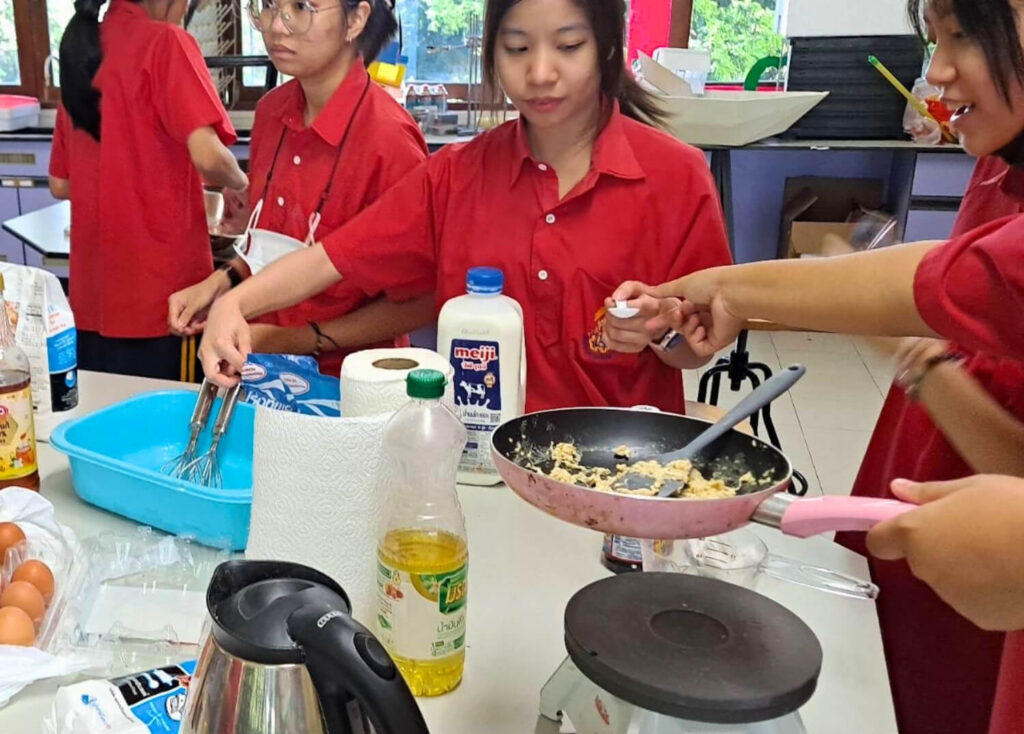
- Gather all ingredients, decorations, and tools before starting the activity.
- In a mixing bowl, combine the dry ingredients: flour, baking powder, sugar, and salt.
- In a separate bowl, whisk together the milk, egg, and melted butter.
- Gradually add the wet mixture to the dry ingredients, stirring until smooth.
- Divide the batter into three small bowls if using food coloring.
- Add red food coloring to one bowl for protons, leave one bowl plain for neutrons, and add blue or green food coloring to another bowl for electrons.
- Heat a non-stick frying pan or griddle over medium heat and lightly grease it with butter or oil.
- Pour small amounts of batter, about 1–2 inches in diameter, to create mini pancakes representing atomic particles.
- Cook each side for about 1–2 minutes or until golden brown, then set the pancakes aside.
- Place a larger plain pancake at the center to serve as the base nucleus.
- Arrange red pancakes or strawberries as protons and plain pancakes or banana slices as neutrons on the nucleus.
- Place smaller pancakes, blueberries, candies, or colored syrup dots around the nucleus to represent electrons.
- Use toothpicks, skewers, syrup, or arrangement patterns to show electron paths or shells.
- Label the model using chocolate syrup, icing, or small signs.
- Present the model by explaining which element it represents and describing the number of protons, neutrons, and electrons.
- Dispose of non-edible items such as toothpicks or skewers after the activity.
- Wash all utensils, pans, and work areas properly.
- Enjoy the edible model as a treat if allowed and if food safety rules have been followed.
👀 Expected Observations
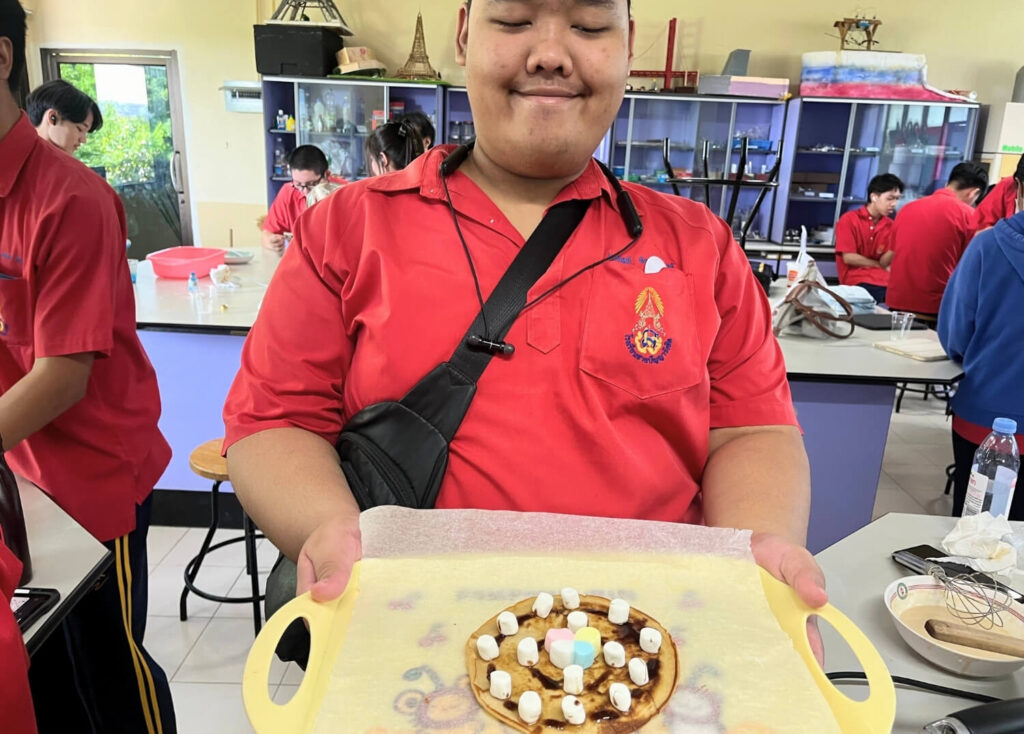
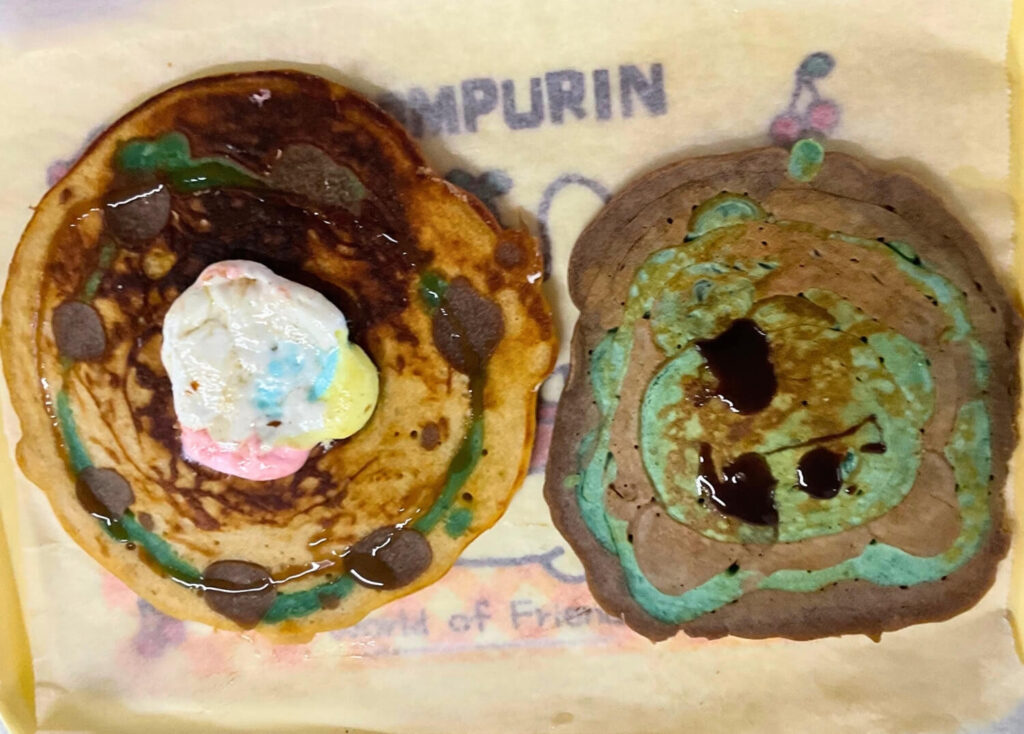
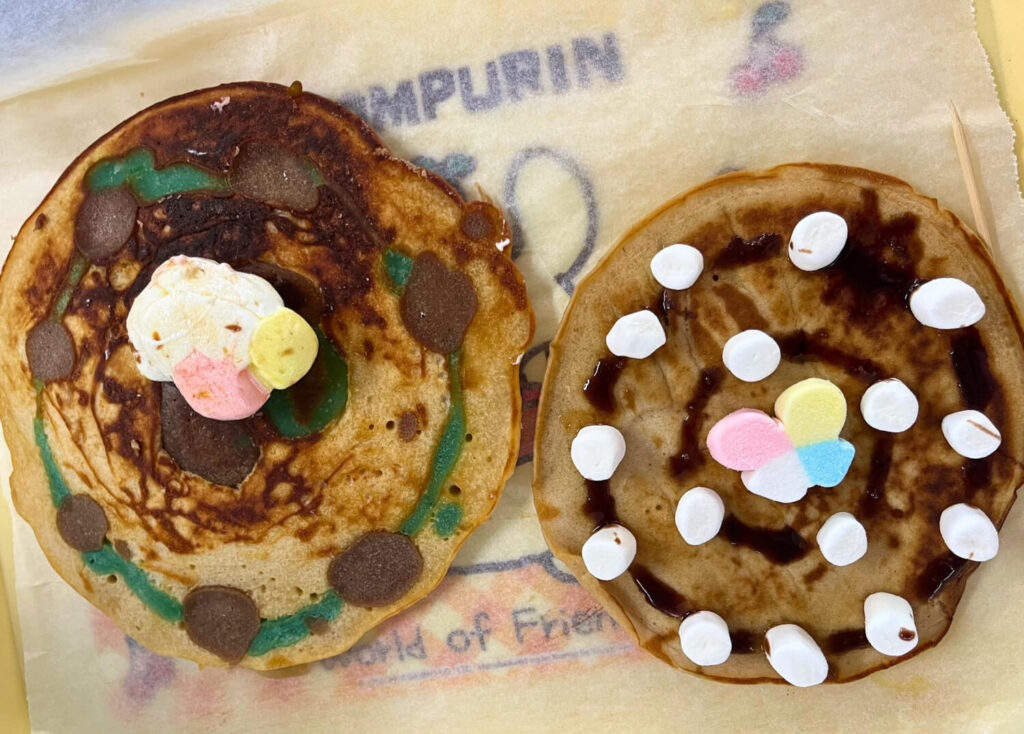
Students may observe:
- Pancakes of different sizes and colors representing atomic parts
- A central nucleus made of protons and neutrons
- Electrons placed around the nucleus using candies, berries, syrup dots, or smaller pancakes
- Different atomic models depending on the chosen element
- A clearer visual difference between hydrogen, helium, carbon, or other elements
- Stronger understanding when students physically build and explain the structure
🧠 What’s Happening?
The Edible Atomic Model Lab Activity helps students turn an abstract chemistry concept into a visible, hands-on experience. Atoms are made of protons, neutrons, and electrons. Protons and neutrons are found in the nucleus, while electrons are arranged outside the nucleus. By using pancakes, fruit, and candies, students can physically represent these parts and better understand how atoms are structured.
The activity also helps students see that different elements have different atomic structures. For example, hydrogen has one proton and one electron; helium has two protons, two neutrons, and two electrons; and carbon has six protons, six neutrons, and six electrons. Building these models helps students connect particle arrangement to an element’s identity and behavior.
🌟 Learning Outcomes
Students can learn several important concepts and skills through this activity:
- Atomic Structure
- Students understand that atoms are made of protons, neutrons, and electrons.
- Students understand that atoms are made of protons, neutrons, and electrons.
- Protons, Neutrons, and Electrons
- Students identify the locations of each subatomic particle in a model atom.
- Students identify the locations of each subatomic particle in a model atom.
- Element Identity
- Students learn that the number and arrangement of particles help define an element.
- Students learn that the number and arrangement of particles help define an element.
- Creative Scientific Modeling
- Students use everyday materials to represent scientific ideas.
- Students use everyday materials to represent scientific ideas.
- Measurement and Precision
- Students practice measuring ingredients and following a process carefully.
- Students practice measuring ingredients and following a process carefully.
- Teamwork and Collaboration
- Students work together to cook, decorate, assemble, label, and explain their model.
- Students work together to cook, decorate, assemble, label, and explain their model.
- Memory Retention
- Students are more likely to remember the concept because the activity is visual, tactile, and interactive.
🎓 Classroom Notes
- This activity works best as a supervised food-based chemistry lab.
- It is especially effective for introducing atomic structure in a fun and memorable way.
- The strongest teaching value comes from asking students to explain their model after they have built it.
- Students can work in groups to create different elements and compare atomic structures.
- This activity supports visual, kinesthetic, and collaborative learning while making chemistry more approachable.
💬 Discussion Questions
- What are the three main parts of an atom?
- Which parts of the model represent protons?
- Which parts of the model represent neutrons?
- Which parts of the model represent electrons?
- Where is the nucleus located in the atomic model?
- How is a hydrogen model different from a helium model?
- Why does carbon need more particles than hydrogen or helium?
- How does building the model help make the atomic structure easier to understand?
- What was challenging about representing an atom with edible materials?
- How can creative models help students remember scientific ideas?
🚀 Extension / Challenge
- Build models of hydrogen, helium, and carbon, then compare them.
- Create an edible model of oxygen or nitrogen.
- Label each particle clearly and explain its role.
- Draw the same atom as a diagram after building the edible model.
- Compare edible atomic models with traditional plastic or foam models.
- Research how atomic structure affects an element’s properties.
- Create a group presentation explaining the chosen element.
- Design a model showing electron shells more clearly.
- Reflect on how cooking skills connect to scientific precision.
- Propose another creative material that could be used to model atoms.
⚠️ Safety Note
This activity uses hot pans or griddles, so it should be carried out in a controlled classroom or kitchen-lab setting under teacher supervision. Students should handle heated surfaces, utensils, and toothpicks or skewers carefully. Teachers should also check for food allergies, dietary restrictions, and hygiene requirements before allowing students to prepare or eat the models.
📂 Media & Resources
For downloadable files and complete teaching resources, visit our Download Center.



![[BFITS] Be Like Millie_Sharing My Essential Tips as an English Teacher Expat in Thailand](https://bfitsthailand.com/wp-content/uploads/2025/03/BFITS-Be-Like-Millie_Sharing-My-Essential-Tips-as-an-English-Teacher-Expat-in-Thailand-300x109.jpg)

![[BFITS] BrightMinds Series_The Future is Yours KickOff Session on Expert Insights for Your Future Career with Mr. Suthichai Yoon](https://bfitsthailand.com/wp-content/uploads/2025/01/BFITS-BrightMinds-Series_The-Future-is-Yours-KickOff-Session-on-Expert-Insights-for-Your-Future-Career-with-Mr.-Suthichai-Yoon-300x109.jpg)