
The Cathode Ray Tube Experiment is a classic physics laboratory activity that helps students understand electrons, subatomic particles, and the development of atomic theory. In this supervised physics lab, students observe how cathode rays behave in electric and magnetic fields. It is a powerful way to connect the history of science with modern ideas in atomic structure and electronics.
📘 Overview
The cathode ray tube experiment is one of the most important investigations in physics because it contributed to the discovery of the electron. J.J. Thomson’s work in 1897 showed that cathode rays were made of negatively charged particles, challenging the earlier belief that atoms were indivisible. This experiment helped transform atomic theory and laid the foundation for later developments in electronics and modern physics.
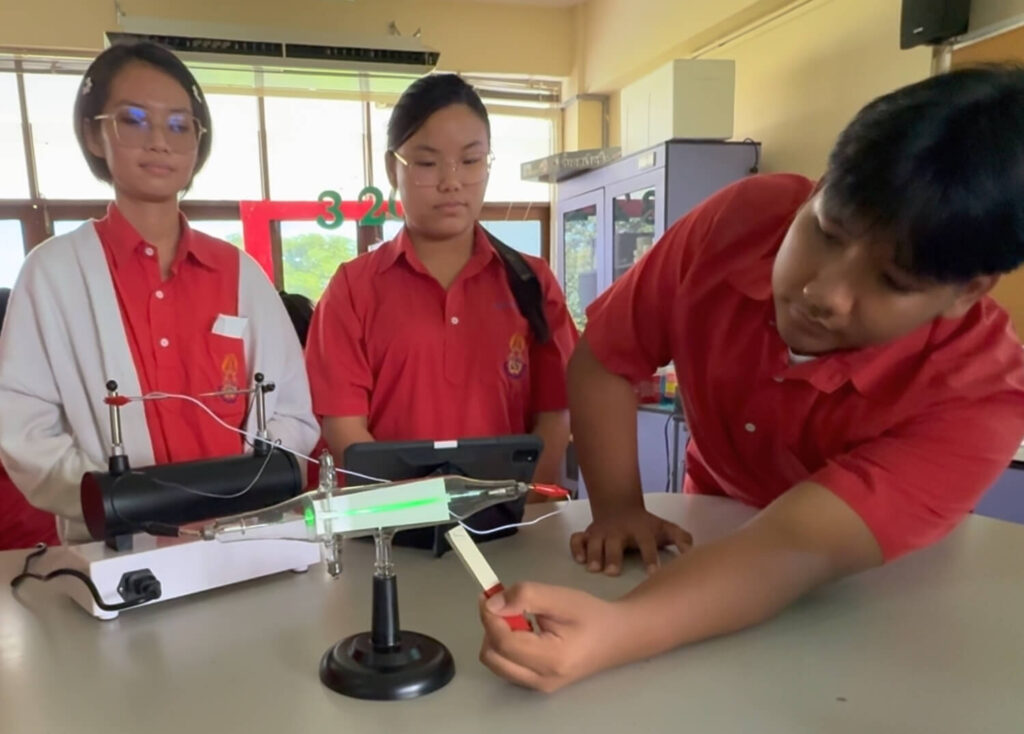
In this classroom version, students observe the behavior of cathode rays inside a sealed glass tube. By studying how the beam moves, bends, and responds to electric or magnetic fields, students can better understand charge, particle motion, and the evidence that led scientists to identify the electron.
🎯 Learning Objective
- Students will describe the purpose of the Cathode Ray Tube experiment.
- Students will observe how cathode rays behave in electric and magnetic fields.
- Students will explain why cathode rays are considered negatively charged particles.
- Students will connect the experiment to the discovery of the electron.
- Students will understand how this experiment influenced atomic theory and modern electronics.
🧪 Materials

- Cathode Ray Tube (CRT)
- A sealed glass tube containing a cathode and an anode with low-pressure gas inside.
- A sealed glass tube containing a cathode and an anode with low-pressure gas inside.
- High-voltage power supply
- Used only by the teacher or trained laboratory supervisor to operate the CRT safely.
- Used only by the teacher or trained laboratory supervisor to operate the CRT safely.
- Magnetic field source
- A pair of bar magnets or a controlled magnetic-field setup used to observe beam deflection.
- A pair of bar magnets or a controlled magnetic-field setup used to observe beam deflection.
- Electric field apparatus
- Parallel plates or a classroom-safe apparatus used to show how an electric field affects the beam.
- Parallel plates or a classroom-safe apparatus used to show how an electric field affects the beam.
- Fluorescent screen
- Helps make the beam’s position visible when cathode rays strike the screen.
- Helps make the beam’s position visible when cathode rays strike the screen.
- Measuring instruments
- Rulers, protractors, or voltmeters may be used for recording observations and measurements.
- Rulers, protractors, or voltmeters may be used for recording observations and measurements.
- Safety equipment
- Includes insulated gloves, goggles, proper grounding, and teacher-controlled setup.
📝 Procedure
- Begin with a short discussion of J.J. Thomson’s cathode ray tube experiment and its role in the discovery of the electron.
- Review the safety expectations before using any CRT or electrical apparatus.
- Ensure the apparatus is set up only by the teacher or a trained laboratory supervisor.
- Place the CRT on a stable surface and confirm that the setup is properly secured and supervised.
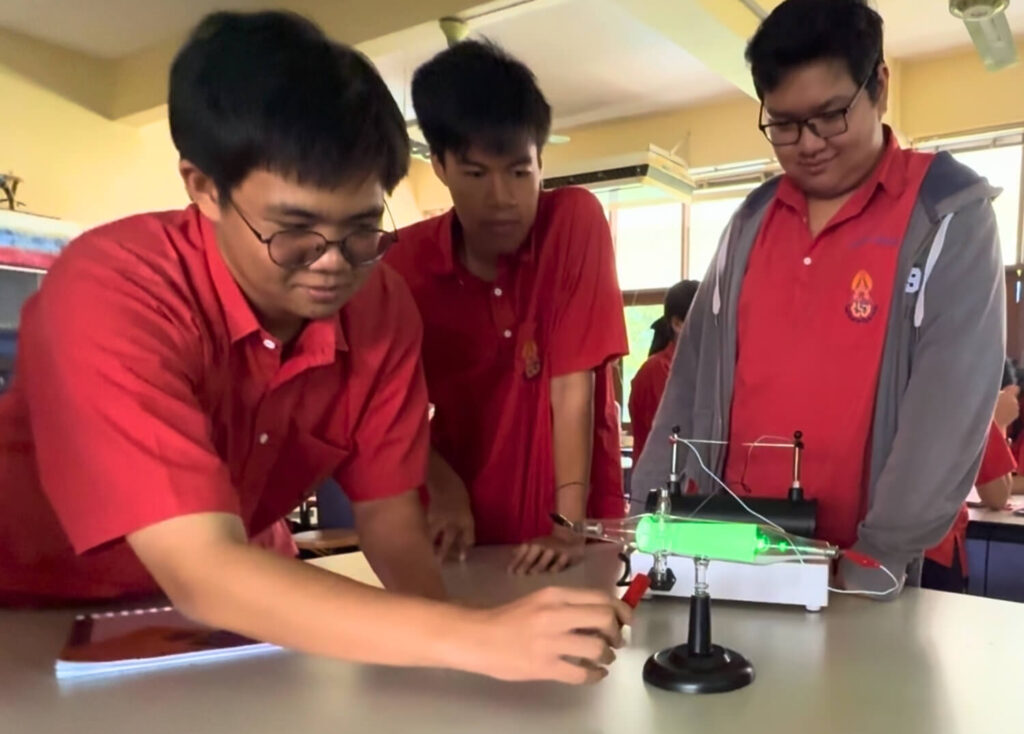
- Observe the cathode ray beam as it appears on the fluorescent screen.
- Ask students to note the beam’s straight-line path before any field is applied.
- Introduce a magnetic field near the beam and observe the direction of deflection.
- Use the observation to discuss how magnetic fields affect moving charged particles.
- Introduce an electric field using the classroom apparatus and observe how the beam changes direction.
- Reverse or adjust the field conditions only under teacher supervision and observe the change in beam behavior.
- Record observations such as beam position, direction of deflection, and changes under different field conditions.
- Discuss how the beam’s behavior supports the idea that cathode rays are negatively charged particles.
- Connect the observations to Thomson’s conclusion that electrons are subatomic particles found in atoms.
👀 Expected Observations
Students may observe:
- A visible beam appearing inside the cathode ray tube
- The beam traveling in a straight path before fields are applied
- The beam bending or deflecting when exposed to a magnetic field
- The beam changing direction when exposed to an electric field
- Opposite deflection when field direction is changed
- Evidence that cathode rays behave like negatively charged particles
- A connection between beam behavior and the discovery of the electron
🧠 What’s Happening?
Inside the cathode ray tube, cathode rays travel from the negative electrode toward the positive electrode. When these rays interact with electric or magnetic fields, they change direction. This deflection shows that the rays are not simply light waves; they behave like charged particles.
J.J. Thomson used this behavior to conclude that cathode rays were made of negatively charged particles, later called electrons. This discovery was important because it showed that atoms were not indivisible. Instead, atoms contain smaller particles. This changed the scientific understanding of matter and helped shape modern atomic theory.
🌟 Learning Outcomes
Students can learn several important concepts through this experiment:
- Cathode Rays
- Students observe how rays move inside a cathode ray tube.
- Students observe how rays move inside a cathode ray tube.
- Electrons
- Students connect cathode ray behavior to the discovery of negatively charged particles.
- Students connect cathode ray behavior to the discovery of negatively charged particles.
- Electric and Magnetic Fields
- Students see how fields can change the path of charged particles.
- Students see how fields can change the path of charged particles.
- Charge-to-Mass Ratio
- Students are introduced to how scientists used measurements to compare the properties of electrons.
- Students are introduced to how scientists used measurements to compare the properties of electrons.
- Atomic Theory
- Students understand why the discovery of the electron led to the development of earlier models of the atom.
- Students understand why the discovery of the electron led to the development of earlier models of the atom.
- Scientific Discovery
- Students learn how careful observation and experimentation can reshape scientific understanding.
- Students learn how careful observation and experimentation can reshape scientific understanding.
- Modern Technology
- Students connect CRT research to technologies such as televisions, oscilloscopes, monitors, X-ray machines, and electron microscopes.
🎓 Classroom Notes
- This activity works best as a supervised teacher-led physics demonstration because CRT equipment involves high voltage and glass vacuum tubes.
- It is especially effective for lessons on atomic structure, electrons, charged particles, and the history of atomic theory.
- The strongest teaching value comes from connecting beam deflection to evidence-based scientific reasoning.
- Students can compare Thomson’s conclusions with earlier and later atomic models.
- This experiment helps students see how one laboratory investigation influenced both modern physics and everyday technology.
💬 Discussion Questions
- What was J.J. Thomson trying to investigate with the cathode ray tube experiment?
- What are cathode rays?
- What happens to the beam when a magnetic field is applied?
- What happens to the beam when an electric field is applied?
- Why does beam deflection suggest that cathode rays are charged particles?
- Why did Thomson conclude that cathode rays were negatively charged?
- How did this experiment challenge the idea that atoms were indivisible?
- What is the importance of the electron in atomic structure?
- How did the CRT experiment influence modern physics and technology?
- Why is careful observation important in scientific discovery?
🚀 Extension / Challenge
- Research J.J. Thomson’s contribution to atomic theory.
- Compare Thomson’s atomic model with Rutherford’s nuclear model.
- Create a timeline showing how the atomic theory changed over time.
- Draw a diagram of a cathode ray tube and label its main parts.
- Explain why electric and magnetic fields affect charged particles.
- Research how CRT technology was used in old televisions and monitors.
- Compare cathode rays with modern electron beams used in technology.
- Write a short explanation of why the electron discovery was revolutionary.
- Research one modern device that depends on electron behavior.
- Reflect on how this experiment shows the connection between science history and modern innovation.
⚠️ Safety Note
This experiment involves high-voltage equipment and a sealed glass tube, so it should only be conducted by a trained teacher or qualified laboratory supervisor. Students should observe from a safe distance and should not handle the power supply, wiring, or CRT apparatus unless explicitly instructed to do so under direct supervision.
The apparatus must be properly grounded, inspected before use, and handled with protective equipment to reduce the risk of electric shock or glass damage.
📂 Media & Resources
For downloadable files and complete teaching resources, visit our Download Center.


