The Gummy Bear Explosion Experiment is a memorable chemistry experiment that introduces students to exothermic chemical reactions, oxidation, and rapid energy release. In this supervised science laboratory experiment, learners observe how a sugar-based candy can react dramatically in the presence of a strong oxidizing agent. It is an effective way to make chemical reactions feel visible, exciting, and relevant in the classroom.
📘 Overview
Chemical reactions are fundamental to the many transformations that happen in both the natural world and industrial settings. In a laboratory context, students can explore how substances change, how new products are formed, and how factors such as energy and reaction type help explain what they observe. This experiment formed part of a wider study of chemical reactions and equations, helping students relate chemistry concepts to everyday life while engaging more deeply with reaction behavior. In the original lab context, the broader lesson also aimed to help students observe and classify reaction types, examine factors that affect reaction rates, and analyze energy changes in chemical reactions.
This specific activity focuses on the Gummy Bear Explosion Experiment, a dramatic example of an exothermic oxidation reaction. By observing the reaction between a gummy bear and heated potassium chlorate, students can better understand energy release, reaction speed, oxidation-reduction, and the importance of laboratory safety.
🎯 Learning Objectives
- Students will observe and identify evidence of a chemical reaction
- Students will recognize the characteristics of an exothermic reaction
- Students will understand that some reactions release large amounts of energy as light and heat
- Students will explore how oxidation-reduction is involved in chemical change
- Students will connect the experiment to broader ideas in chemical reactions, including reaction rate, energy change, and lab safety
🧪 Materials
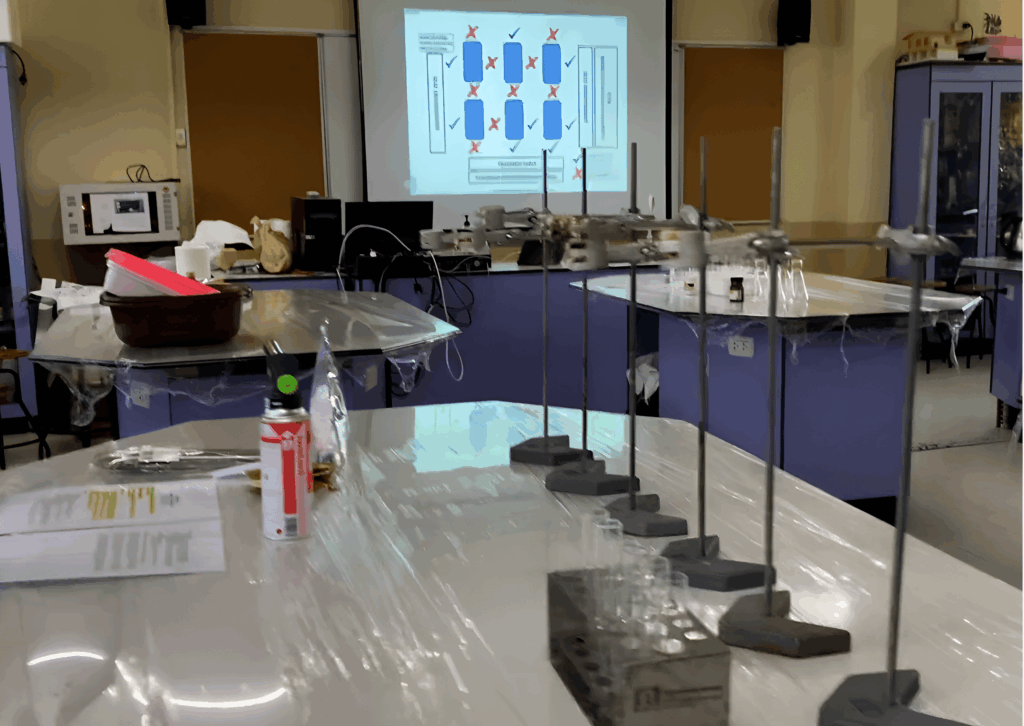
- Potassium chlorate (KClO₃)
- A strong oxidizing agent that decomposes upon heating
- A strong oxidizing agent that decomposes upon heating
- 1 gummy bear
- Serves as the sugar source or fuel for the reaction
- Serves as the sugar source or fuel for the reaction
- Test tube
- A durable, heat-resistant tube to contain the reaction
- A durable, heat-resistant tube to contain the reaction
- Test tube holder or clamp
- To safely hold the test tube during heating
- To safely hold the test tube during heating
- Bunsen burner or hot plate
- For heating the potassium chlorate until it melts
- For heating the potassium chlorate until it melts
- Tongs or tweezers
- For carefully introducing the gummy bear
- For carefully introducing the gummy bear
- Safety equipment
- This includes a lab coat, safety goggles, heat-resistant gloves, and a face shield
- This includes a lab coat, safety goggles, heat-resistant gloves, and a face shield
- Fume hood (optional but recommended)
- To ventilate and contain any fumes produced during the reaction
- To ventilate and contain any fumes produced during the reaction
- Fire extinguisher nearby
- For emergency readiness during the experiment
📝 Procedure
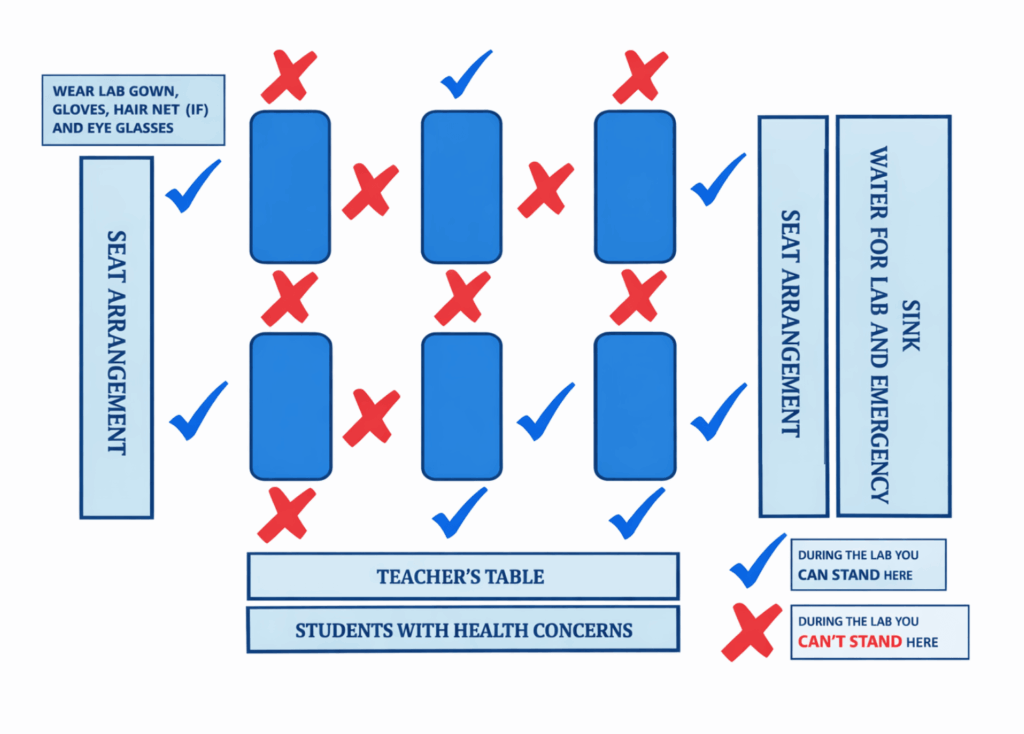
- Ensure all students and instructors are wearing appropriate safety gear, including goggles, gloves, and lab coats.
- Conduct the experiment in a well-ventilated area, ideally under a fume hood to help contain any fumes.
- Make sure the work area is clear of flammable materials before starting.
- Place a small amount of Potassium chlorate (KClO₃) into a test tube.
- Secure the test tube safely in a holder or clamp.
- Use a Bunsen burner or hot plate to carefully heat the potassium chlorate until it melts.
- Heat the substance gently to avoid splattering or any premature reactions.
- Once the potassium chlorate has melted, carefully drop a gummy bear into the test tube using tweezers or tongs.
- Stand back immediately, as the reaction will occur almost at once.
- Observe the reaction as the gummy bear ignites and produces a burst of light, heat, and smoke.
- Students should observe the color change, light emission, and any gas production.
- Once the reaction is complete, allow the test tube to cool fully before handling it.
- Dispose of any remaining residue safely and clean the equipment carefully.
👀 Expected Observations
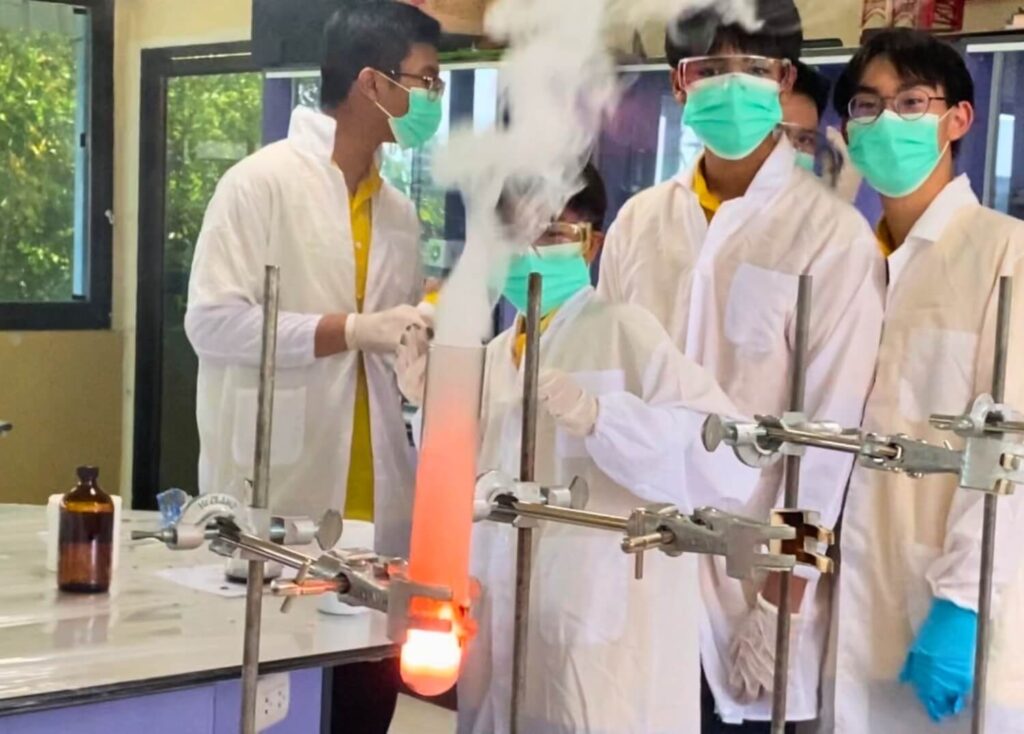
Students may observe:
- A bright and fiery reaction
- Intense heat is released during the process
- Smoke and visible gas production
- A rapid and dramatic reaction once the fuel is introduced
- Clear evidence that this is an exothermic reaction
- A strong visual example of combustion occurring in the presence of an oxidizer
🧠 What’s Happening?
This experiment is an example of an exothermic oxidation reaction. Potassium chlorate acts as the oxidizer. When heated, it can release oxygen, and that oxygen supports the rapid reaction of the sugar in the gummy bear. Because the gummy bear contains chemical energy stored in its bonds, the reaction releases that energy quickly in the form of heat and light.
The activity also demonstrates oxidation-reduction (redox). In simple terms, one substance helps another react by enabling oxygen-related chemical change. The speed and intensity of the reaction make it useful for teaching students that some reactions happen gradually, while others occur very quickly under the right conditions. This connects directly to the study of reaction kinetics and energy in chemical bonds.
🌟 Learning Outcomes
Students can learn several important chemistry concepts through this experiment:
- Exothermic Reactions
- Students see how energy can be released in the form of heat and light
- Students see how energy can be released in the form of heat and light
- Oxidation-Reduction Reactions
- Students explore how an oxidizer and a fuel interact in a rapid chemical change
- Students explore how an oxidizer and a fuel interact in a rapid chemical change
- Reaction Kinetics
- Students observe how quickly the reaction takes place once conditions are suitable
- Students observe how quickly the reaction takes place once conditions are suitable
- Energy in Chemical Bonds
- Students connect the dramatic reaction to the idea that substances store chemical energy
- Students connect the dramatic reaction to the idea that substances store chemical energy
- Lab Safety and Precautions
- Students understand why personal protective equipment and controlled procedures matter in chemistry
🎓 Classroom Notes
- This experiment is best conducted as a supervised student laboratory experiment only when the teacher determines that the setup, materials, and controls are appropriate.
- In some settings, it may be better presented as a teacher-led demonstration depending on the class level and safety conditions.
- It works especially well in a lesson on chemical reactions, equations, energy change, or redox.
- The strongest teaching value comes from guided observation and scientific explanation.
- Students can be asked to record signs of chemical change, classify the reaction, and explain why it is exothermic.
- This experiment also supports the discussion on how chemistry connects to real-world reactions and why safe handling of chemicals matters.
💬 Discussion Questions
- What signs showed that a chemical reaction took place?
- Why is this experiment considered exothermic?
- What role does the gummy bear play in the reaction?
- What role does potassium chlorate play in the reaction?
- Why does this reaction happen so dramatically?
- How can light and heat help us identify a chemical change?
- Why is oxygen important in this demonstration?
- How does this experiment connect to oxidation-reduction?
- What does this activity teach us about chemical bond energy?
- Why should this demonstration only be done with strict safety controls?
🚀 Extension / Challenge
- Compare this demonstration with a slower everyday combustion reaction.
- Research the meaning of oxidizing agent.
- Explain why sugar can act as a fuel in some reactions.
- Create a concept map using the terms combustion, oxidation, energy, and exothermic.
- Write a short explanation of how this experiment shows chemical energy being released.
- Compare this experiment with Elephant’s Toothpaste in terms of visible results.
- Identify three pieces of evidence that a new substance or new products may have formed.
- Explore why reaction conditions can affect reaction speed.
- Describe how this demonstration supports learning in a chemical reactions unit.
- Reflect on how strong visuals can make science concepts easier to remember.
⚠️ Safety Note
This experiment involves reactive chemicals, high heat, and a rapid combustion process. It should only be carried out in a controlled laboratory setting under direct teacher supervision with full protective equipment, proper ventilation, and emergency readiness. Students should not attempt to recreate this activity on their own or outside a supervised lab environment. The station instructions also emphasize a controlled environment, protective gear, good ventilation, and a fire extinguisher nearby.
📂 Media & Resources
For downloadable files and complete teaching resources, visit our Download Center.